Pages

Showing posts with label display. Show all posts

Thursday, September 12, 2013

Painting Props in the Studio

I bought my most FAVORITE color combo of the moment- twilight blue and icy aqua. Or per the paint chip names: "Twilight" and "Jamaican Aqua". And now I am scooping up useful wooden objects right and left and turning them into display components in my little shop at home. Some are for traveling too.

My first expedition into painting was the motivation to buy these colors - a new sign for fairs (and currently hanging in the little shop too). My husband built it and it is made from primitive antique fence posts and clapboard plus one piece of wood with great rusty nail heads I found on the beach.


And here it is in action at the Puffin Festival in Elliston, NL:


Next I ended up at an auction in Trinity, NL and found this wonderful, discarded, handcrafted suitcase in need of some TLC. I sanded it, cleaned off the rust, replaced the broken hinges and then meticulously painted...for days. Once dry, I sanded some more to get the distressed look I wanted. I am still working on it to convert it into a traveling display; adding a 3rd panel, components to hang jewelry from and if really ambitious, wheels and a telescopic handle (wish list).

BEFORE:


AFTER:


And then I found this odd handmade pedestal at a thrift shop. It needed gluing. So I glued, sanded and painted it ombre. It can be flipped over too so either the light or dark can be the top. Inspired by the stairs in my friend Crystal's new studio, Little Free Radical.

BEFORE:


AFTER:
In action in the little shop with my new necklace displays and a mirror I also painted (another thrift shop score)...addicted to these colors right now!

Sunday, January 02, 2011

TUTORIAL: Fabric Covered Bulletin Board


I've been offered retail space in Northfield, MN and was looking for very inexpensive display ideas to jazz up a 3"x3" black metal grid display panel and to economize on the space (2'x 5' total). The goal was to find a creative, effective, space efficient idea that wouldn't cost me much dough -re-mi.

I'd been dying to check out a newer thrift shop in Northfield (new to me) and was glad I did. I scored a 2' x 1.5' bulletin board for a buck! The cork wasn't pretty, but that is totally okay, I planned to cover it in fabric anyway. I like the idea of displaying jewelry within frames, but needed something large enough to house a lot of jewelry. This fit the bill. MATERIALS:
-bulletin board
-fabric (larger than bulletin board)
-iron
-scissors
-staples, tacks or straight pins.

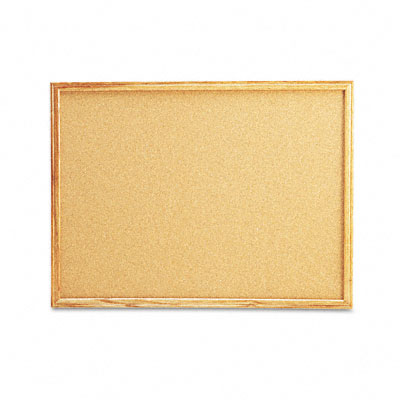
1.) To get started you will need a bulletin board. Any size will do. Pick out a fabric you like to use to cover it. Something stiffer or heavier is better as it won't sag or show the pin marks as much as finer fabrics. I used some sort of heavy woven rayon, it reminds be of 'burlap-lite'.

Depending on what you want to use your bulletin board for will help you decide what fabric to use. If you're using it on a wall in a room, think of a fun print that compliments your space. Pictures and notes will jump off nicely. If you are using it for jewelry display like I am, consider a solid color, or a very small scale/monotone print or texture.

I go back and forth as to whether I find jewelry pops better on a light or dark background. It all depends on the jewelry and the lighting. I opted for navy blue this time around. I thought it would make the subtle natural frame pop more and give me that framed jewelry look I was hoping for.

2.) Make sure you have a piece of fabric a little larger than the bulletin board. Once you have picked out your fabric, iron it. Then place it over the board and cut around the edges. IMPORTANT: make sure you cut 1/2"-1" extra on each side as you will be tucking this under to give a finished edge to your look.

3.) Once you have your fabric cut, center it over the cork. I found it works best to start in the center of the longest edge. Fold the edge of the fabric under. Here you get to make another style decision: staples, tacks or pins. I find staples to be quick and to give you a long lasting hold. Tacks are also good. Pins may need to be readjusted periodically to keep the fabric taught. Once you have decided which sharp implement to use, tack down the edge of the fabric in one spot.

4.) Smooth out the fabric and pull it tight to the opposite side. Fold under the fabric edge and tack it down.

5.) Repeat this step working your way from the middle out. Once you reach the corners, you will have to fold down the edges of both sides at once.

6.) As with the long sides, start in the center, fold fabric under and tack. Pull taught to opposite side, fold fabric under and tack. Repeat until all edges are securely tacked down.

7.) Fin!

Here are some pictures of my finished fabric covered bulletin board.


And here it is in action!

Wednesday, May 19, 2010

Finishing Touches on Display elements


What a busy week scouring my favorite stuff (aka junk) stores for treasures and unique quirky display components. I'd searched the internet for necklace displays and was having a heckuva time finding the fabric I liked in the shape and size I liked for a price I was willing to pay when...lo and behold...I stumbled into Jerry's Department Store aka Witch City Consignment here in Salem and found that had just purchased an enormous lot of props from 20th Century Fox which included necklace displays and mannequins (passed on the mannequins).

I picked up several used necklace displays which I took home, stripped of their dressing and made patterns to make new covers out of black velvet. They are finished and DELICIOUS if I do say so myself. Here is a quick peek as well as a peek of a soon to be listed necklace I just made (top).
I also found this delightfully quirky Victorian drying rack which is wall mounted and will hang high above the glass display counter I have. I will mount purses on it. This is a similar one splayed out (mine's not mounted yet, thank you Google images for this one).

Sunday, May 16, 2010

Mmmm, Pointy Hand Open Sign

Steve & I set up several fixtures and display details in the store this week. The highlights include the dressing area. (Better pictures pending). We used a hula hoop and I hand sewed the curtains around it.

This is a vine a kind artist, Dan Brown, of the Salem Arts Association gave me. I've shellacked it and mounted it on these plant hangers that cast a lovely shadow when all the lights are on. Purses will hang from this to take advantage of verticle display space.

My store mate, a potter, found this great letterpress drawer which I've turned into a jewelry display rack. I strung wire between eye screws. Earrings will hang from this. The drawer has this delightful mechanism, originally intended to keep it from falling out of it's cabinet, which, now that I've oriented it sideways, serves as a simple mechanism that moves up and down when you press the button. I couldn't resist the opportunity to turn this into an animated sculpture complete with cheeky old timey "Press Here" label with pointy hand. After brainstorming a few ideas, I ended up with butterflies. When the button is pressed, the butterflies flutter.

My love of old timey pointy hands extends to my open sign. I traced the outline on a board, Steve artfully cut it with a skill saw. I sanded it and sculpted the knuckles and then painted it.