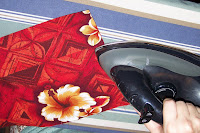

The following picture tutorial will teach you how to make a sewing kit. This sewing kit is great for beginners as it covers several basic skills - sewing seams with right sides together, clipping corners to reduce bulk, turning and pressing pieces - like one would do for a pillow case, pressing up a hem and stitching - like you could do to hem pants, top-stitching, sewing on a button and hand stitching.
I've included pictures of each step as again, this is a great project for beginners. To view any of the pictures larger, simply click on them.
Sewing Kit
Materials:
1 - 20" x 15" piece of cotton fabric
1 - Button
1 - 8" - 10" piece of ribbon (1/2" wide or less is best)
Equipment:
Sewing Machine (you could also hand stitch the whole thing as well)
Iron
Needle
Thread
Scissors
Pins
Suggested supplies to fill your finished sewing kit:
Safety Pins
Straight Pins
Needles
Spools of Thread
Needle Threader
Small scissors (manicure scissors are great)
Seam Ripper
Measuring Tape etc.
Instructions:
1. Cut a rectangle of fabric 20" x 15".

2. With right sides together (in sewing the right side is what you would consider the outside - the bolder print, the front, the wrong side is the back/inside/less bright print), fold the fabric in half on the 20” long side. Pin each side. When you pin be sure to insert the pins perpendicular to the edge/stitch line.

3. Stitch down each side about 5/8” in from the edge. Be sure to back stitch at each end. Remove pins. Trim threads.

4. Trim the corners at a diagonal on the fold end of the seam. Be careful not to clip the stitches.

5. Turn right side out, use a blunt pointed object to push out the corners to give a sharp finish and press with the iron.

6. The fold side will be the top, the rough raw edge will be the bottom. Fold the raw edge up ½” and press with the iron. Fold up a second time ½” hiding the raw edge and iron again. Pin the ironed side.


7. Stitch along the inner edge of the folded side. Back stitch at each end. Remove pins. Trim threads.

8. Fold up the bottom edge about 3” (just under half way) with the folded edge facing inside. Pin both sides and stitch the full length of the sides. Remove pins. Trim threads.

9. With the bottom of pocket facing you, fold the fabric in thirds like a letter, bringing the stitched edges to meet the folds. Mark the crease lines with a pin at the top and the bottom of each.

10. Stitch from the bottom of the sewing kit to the top, back stitch at both ends, following the invisible crease line you marked with the pins. Do this for both crease lines. Remove pins. Trim threads.
11. Fold the sewing kit in half, lining up the two stitched sides, mark the crease line with a pin at the top and bottom as you did in the previous step. Stitch from the bottom of the sewing kit to the top, back stitch at both ends, following the invisible crease line you marked with the pins. Remove pins. Trim threads.


12. Fold the sewing kit in thirds along your stitch lines. Insert the right side flap first. On the outside of the left hand flap, attach a button about 1” from the edge, half way up the front. Be careful not to sew it into your pocket, thus stitching your pocket closed.

13. Close the sewing kit again. With your 8” – 10” strip of ribbon, make a loop around the button. Line up the ends of the ribbon and reach them around to the back, fold the raw ends under, pin in place and stitch the ribbon loop. Again, be careful not to sew into your pocket on the inside.

 14. To finish, insert pins, needles, spools of thread and needle threader that are provided today. At home, you can add a small pair of scissors, a seam ripper, a tape measure and more!


No comments:
Post a Comment